Build guides · Tables & work surfaces
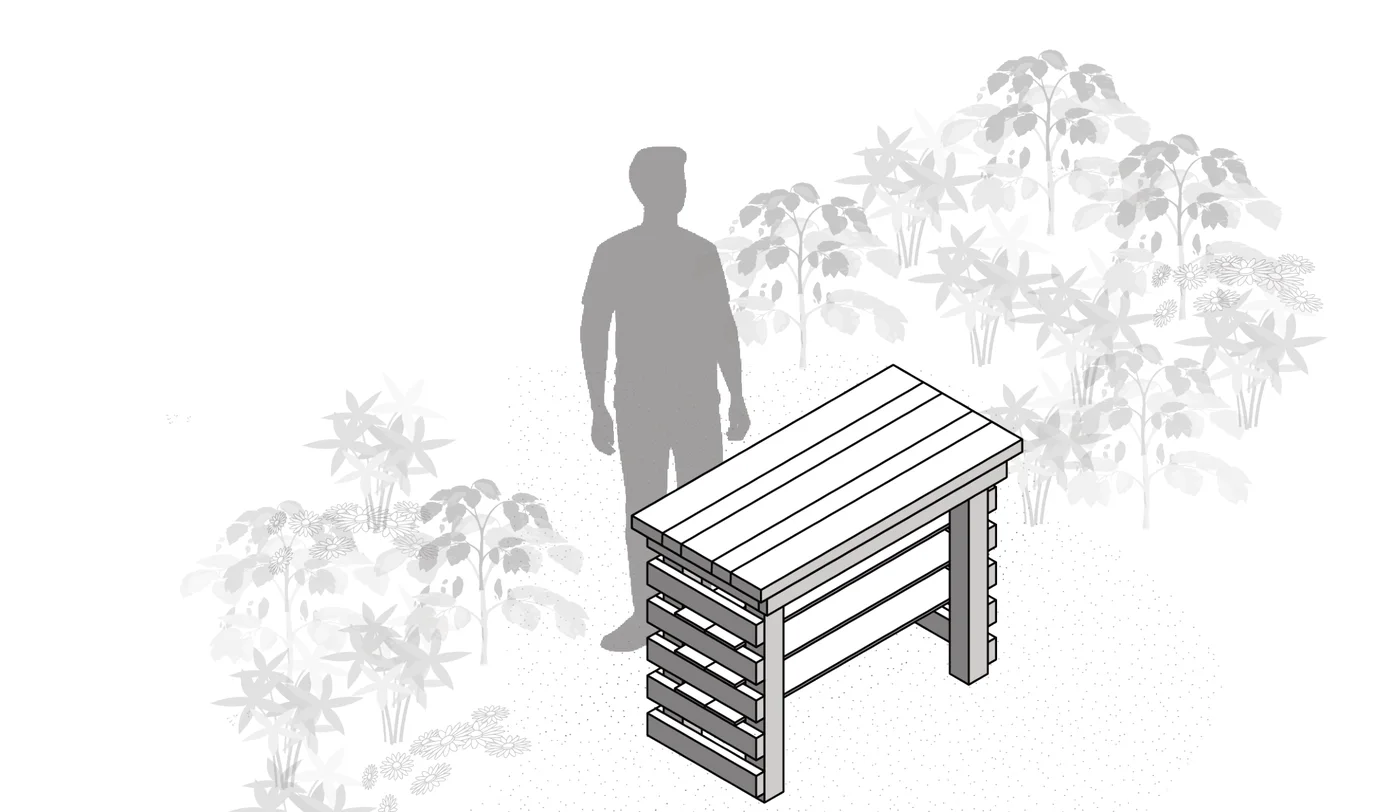
Workbench / Standing Table
A standing-height potting table on 4x4 legs with three shelf levels underneath and a five-board top. The source drawing has no dimension diagram, so these overall dimensions are derived from its cut list and assembly steps rather than read off the cover.
- Size
- 4' L × 1'-11.5" W × 2'-11.5" H
What you need
Before you begin
- These are DIY recommendations only — tailor the material, assembly and construction to your own project and site.
- Building this assumes some working knowledge of hand and power tools, hardware, fasteners, lumber and basic assembly technique.
- Before using any power equipment, review and follow the manufacturer's safety requirements, and don't let anyone use power tools who hasn't done the same.
- You (the owner) are responsible for any building and safety codes, permits and regulatory approvals this needs.
- Clear the site of trash, hazards and unwanted structures first, and identify any utilities that could interfere before you dig.
- Everyone helping build should sign a volunteer waiver.
Cut list
| Part | Qty | Stock | Length | Notes |
|---|---|---|---|---|
| A-1 | 12 | 2x4 | 20" | Side brace |
| A-2 | 6 | 2x4 | 41" | Back brace |
| A-3 | 1 | 2x4 | 44" | Front brace |
| A-4 | 6 | 1x6 | 48" | Table shelves (2 boards per shelf, 3 shelf levels) |
| A-5 | 4 | 4x4 | 34" | Table legs |
| B-1 | 3 | 2x6 | 48" | Table top, wide boards (outside edges and middle) |
| B-2 | 2 | 2x4 | 48" | Table top, narrow boards (between the wide boards) |
Steps
Mark, label and cut the lumber
Mark, label and cut lumber into the lengths in the cut list: A-1 side braces, A-2 back braces, A-3 front brace, A-4 table shelves, A-5 table legs, B-1 wide top boards and B-2 narrow top boards.
- It's helpful to write the part letters onto each piece of lumber as you mark it, so you can check you have every piece.
- Keep a separate pile of lumber for each letter.
Build the main frame
Place one 2"x4"x20" (A-1) on a flat surface. Perpendicular from its long edge, measure 41" and place a second 2"x4"x20" (A-1). Place one 2"x4"x41" (A-2) in between the back edge of both A-1 pieces, and secure with an impact driver and four 3" self-driving exterior wood screws.
Place one 2"x4"x44" (A-3) across the front of the two A-1 pieces — it will overhang them slightly — and secure with four more 3" screws.
- Use a carpenter's square to check the frame is square before securing the back and front braces.
Stand the legs
Place one 4"x4"x34" leg (A-5) in each of the four corners of the standing table frame built in step 2.
Secure the legs with an impact driver and sixteen 3" self-driving exterior wood screws — on the front, back, left and right sides of each leg.
- Use a carpenter's square to check each leg is square against the frame before securing it.
Build five more frame pieces and mount the first
Build five more frame pieces the same way as step 2 — one A-2 back brace between two A-1 side braces, secured with four 3" screws each (these don't get a front brace).
Place one of these frame pieces on the bottom of the standing table frame, 2" above the ground, and secure it with an impact driver and twelve 3" self-driving exterior wood screws.
- Use a scrap piece of 2x4 as a spacer when positioning each shelf-support frame against the legs.
Add the first shelf
Place one of the remaining frame pieces 2" above the one placed in the previous step, and secure it with an impact driver and twelve 3" self-driving exterior wood screws.
Place two 1"x6"x48" boards (A-4) next to one another on top of the secured frame, and secure them with an impact driver and eight 3" self-driving exterior wood screws.
Add the second and third shelves
Place another frame piece 2" above the previous one and secure it with twelve 3" screws. Place two more A-4 boards on top and secure with eight 3" screws — that's the second shelf.
Repeat once more for the third shelf: another frame piece, twelve screws, two more A-4 boards, eight screws.
Finally, place the last frame piece 2" above the last shelf and secure it with twelve 3" self-driving exterior wood screws — this one supports the tabletop and doesn't get its own shelf boards.
Lay the tabletop
Place one 2"x6"x48" board (B-1) in the middle of the standing table, with a 2" overhang on the left and right sides, and secure it with an impact driver and four 3" self-driving exterior wood screws.
Place one 2"x4"x48" board (B-2) on either side of the middle board and secure with four more 3" screws.
Place one more 2"x6"x48" board (B-1) on either side of the B-2 pieces and secure with four more 3" screws, completing the five-board top.
Finishing
All edges and surfaces should be lightly sanded to remove splinters or rough edges.
Cedar: no coating required — it will weather to light gray. If you want to keep the as-installed color, use a colorless, wood-penetrating, water-based alkyd stain, or paint with a primer/paint/sealant system.
Pressure-treated: no coating required. If you want color, let it air dry for several months until water no longer beads on the surface; sand while wearing a mask to avoid inhaling treated wood dust. Use an exterior primer + paint and seal with a water-based spar urethane.
Kiln-dried fir or pine: needs a stain with sealer, or a primer/paint/sealer system, to avoid weathering quickly. Can also be painted per the pressure-treated steps above.
Source: WORKBENCH/STANDING TABLE assembly instructions (found inside the Dream workbook's p19 links), pp. 1–11 (cover; before you begin; lumber + hardware + tools; steps 1–6; finishes + coatings)