You haven't recorded permission for your lot yet — you will need it before anyone breaks ground. Go to Acquire → Secure your lot.
What makes your lot special, and how can you best use these features? This step reviews how to evaluate your lot and ensure your park takes advantage of its site conditions.
A lot doesn’t stand alone — it’s part of your community. So assessment needs to include your neighborhood too. Is there a unique history or culture that should be reflected in the design? A park that pays homage to a community’s sense of itself will feel more like an old neighbor rather than a newcomer.
Example project sites are used to illustrate the key steps in this process. Of course, your situation will be different, depending on the location, shape, and context of your own park site — but this is a great place to start.
Site characteristics
In this step, you will document the physical characteristics of the park site. Is the site sunny or shady? Flat or sloped, with existing trees? Or is it across the street from a church? All of these characteristics will influence what you can do on the site. For example, suppose you want to grow tomatoes — your site will need to be sunny throughout the day.
Visit your park site and carefully document what might affect your park’s design. By evaluating the site characteristics before designing the park’s features, you’ll make sure the design is adapted to the site’s unique conditions.
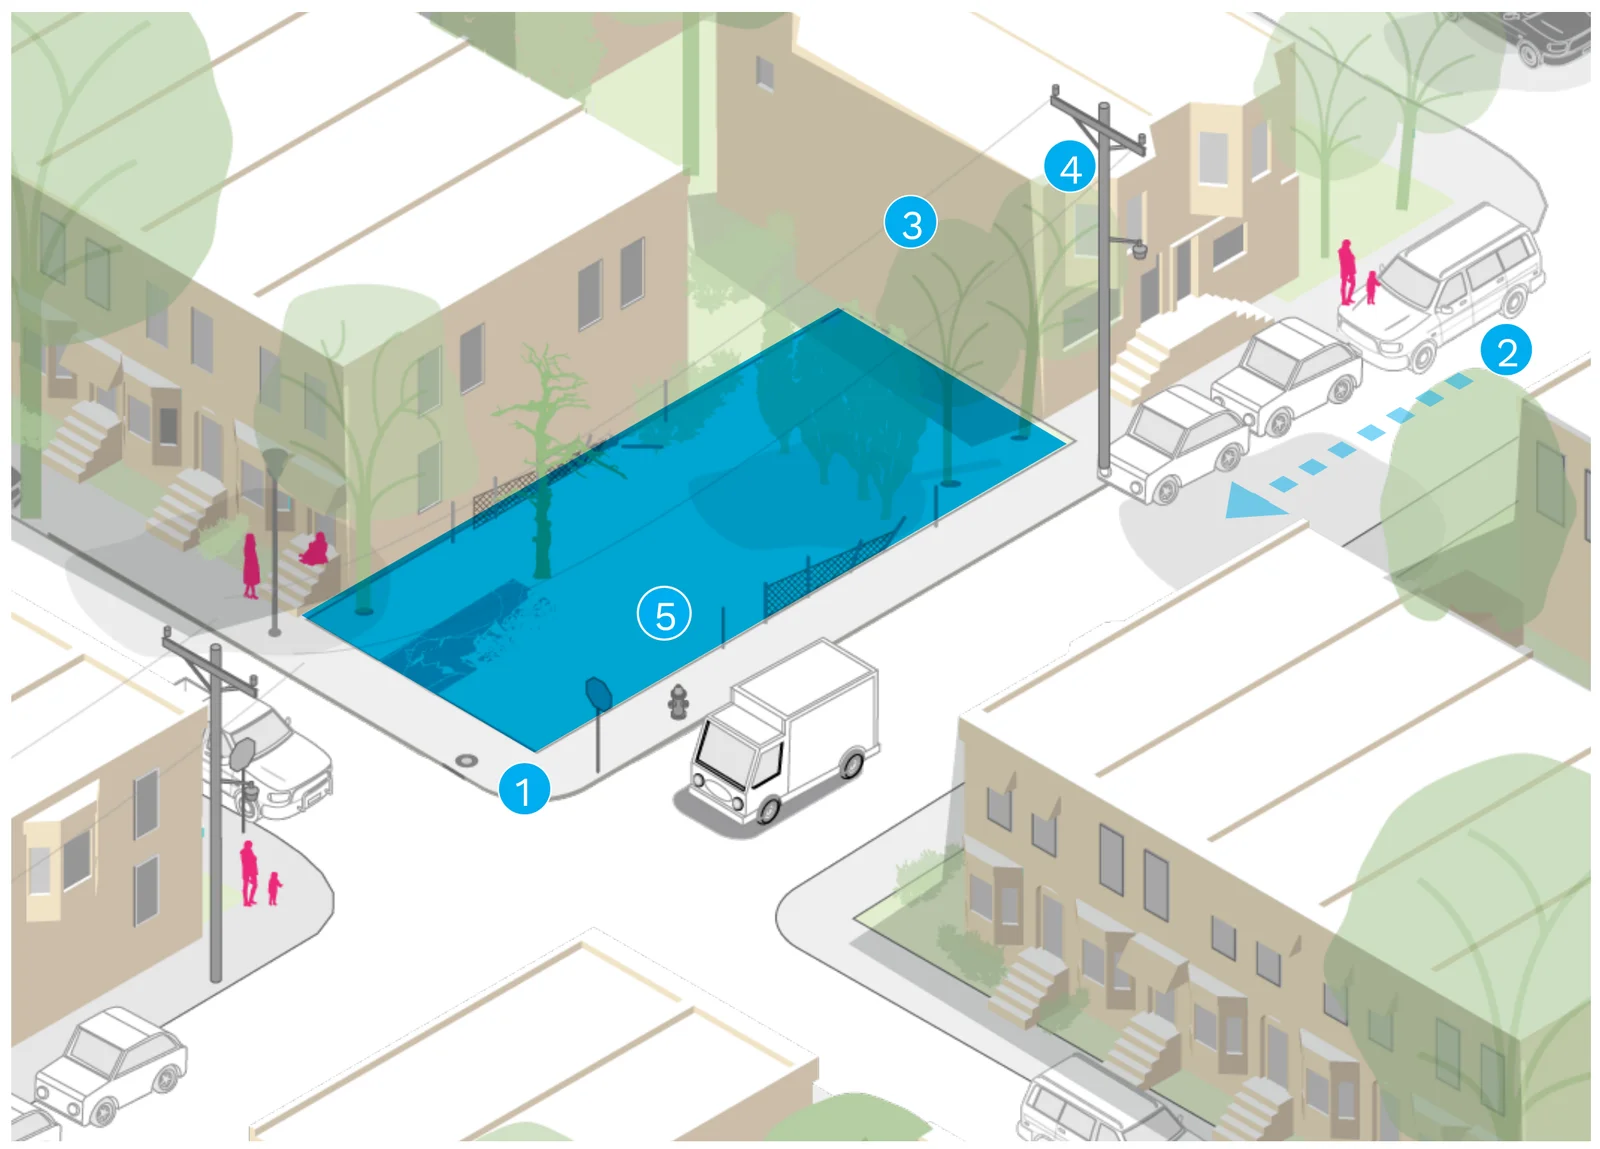
This example lot is unique because of: (1) its location on a busy corner, (2) being on a bus route, (3) a building with a large blank wall at the end, (4) utility lines along the street edge, and (5) a sunny area along the sidewalk. Your lot will have its own list. Document any cultural or historical features of the space and adjacent blocks, too — did an interesting business once occupy the lot? Were there historical events nearby? What did the space look like before there were buildings? This is a great way to engage long-time residents and students who have the research skills to dive into city archives.
Site visit
The following activities can be done as a group or individually when you visit the park site:
- Collect soil samples. Understanding the soil nutrients is very helpful in determining what may grow best in your park. A simple test for lead will also help ensure your park is safe. Penn State Extension offers a simple soil test procedure: agsci.psu.edu/aasl/soil-testing.
- Photograph. We all see the landscape differently, and taking photographs is one way of sharing with others what we see. Set aside 30 minutes to walk around and take photos of the park site and surrounding context. Then share your photos with one another and describe why you took each one.
- Sit and listen. Sit quietly in the park site and listen with all your senses. What can you hear, smell, and touch? After 30 minutes, record what you sensed. Are there positive senses that can be incorporated into the park design, or negative senses that could be lessened by it? How would it be different on a different day of the week, or time of day or night?
- Measure + evaluate. Taking measurements of the park site is a way to help understand it in more detail — the next few steps walk through that.
Measure your lot
Follow the steps below to begin making a diagram of the existing park site. This “base map” can then be printed and used at the site to record locations of various site elements and important characteristics.
Measure it by hand instead
- Navigate to maps.google.com. This site includes aerial photos and tools to measure the property.
- Enter the address for the property, or the next closest property with a known address. Zoom to the address and notice where the existing sidewalk and corners of the property are located. If exact corners aren’t known, estimate for now.
- Review the aerial photograph and determine a starting point to begin taking measurements — one corner of the park property. Right-click (control-click on Mac) on your starting point and select “Measure distance.”
- Find the next closest corner, move the cursor, and left-click. A distance between the two points will appear. Write this number down.
- Drag the starting point to the next corner. Write this number down.
- Repeat for each corner of the park until you have measured each side. The last measurement should be back to the starting point.
Diagram your lot
You will now create a diagram of the current park boundaries. This diagram will be used to record dimensions for objects (like trees, etc.) that are on your site. The diagram is a “plan view,” viewed from directly above, similar to the Google Maps aerial.
The boundary diagram uses grid paper (also called graph paper) to represent the ground, with each small grid segment representing 1 foot of actual length: draw the long side first (the longest edge of the park, from the starting point), then the short side at the end of it, then repeat for the other long and short edges.
⬇ Download grid sheets (PDF)1/4" = 1'-0" — tape sheets together for larger lots
Verify your diagram
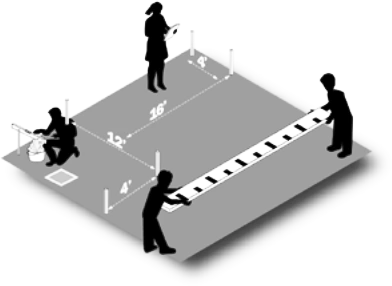
The next step is to visit the park site to measure and record the length of each property boundary by hand. Field-located dimensions measured on-site should be trusted over digital dimensions.
- Locate the project starting point — the same location as where you started in Google Maps (or where the site marked it for you).
- Using a 100-foot tape measure, measure and record the distance along the long outside edge of the park, corner to corner.
- Using a 100-foot tape measure, measure and record the distance along the short outside edge, corner to corner.
- Repeat for the other long edge.
- Repeat for the other short edge.
Record & assess objects
The next step is to record the locations of all objects on the project site, and then assess their condition and potential value to the future park. Objects are located by taking two measurements each: distance from the project starting point along the edge, and distance from the park edge. This is also a good opportunity to note objects immediately adjacent to, but outside, the project site — a utility pole, hydrant, or edge of sidewalk that might influence the park plan.
There are many ways to assess an object once it’s located: beauty/character, expected longevity, stability, potential liability, re-use potential, habitat value, etc. For each one, decide whether it should be kept.
Sun & shade / base plan
Draw the objects you’d like to keep onto your base plan, the same way you measured them: like a treasure map, place a dot or an “X” to mark the spot, with a circle around it sized to its footprint (for a tree or shrub, the circle is the approximate edge of the leaf canopy, with a dot at the trunk).
Then describe the site’s conditions on the same diagram:
- For building shadows, draw the approximate outer edge of the shady area and hatch it in.
- For buildings, draw the outline and hatch it in.
- For overhead utilities, label the location above the site.
- For areas with distinct ground conditions (like wet areas), draw a blob shape at the approximate location.
- For trees, label with the type of tree if you know it (e.g. “Maple tree”).
Summary — are you ready?
Summarize your site’s key characteristics. These will be used in the next step to help design your park.
How long each side is, and the overall square footage, decides your lot size A–E:
| Size | Long edge | Short edge |
|---|---|---|
| A | 44–64 ft | 12–16 ft |
| B | 64–76 ft | 16–28 ft |
| C | 76–88 ft | 28–40 ft |
| D | 88–96 ft | 32–48 ft |
| E | 80–120 ft | 44–60 ft |