You haven't recorded permission for your lot yet — you will need it before anyone breaks ground. Go to Acquire → Secure your lot.
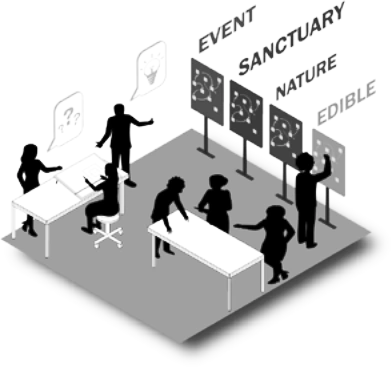
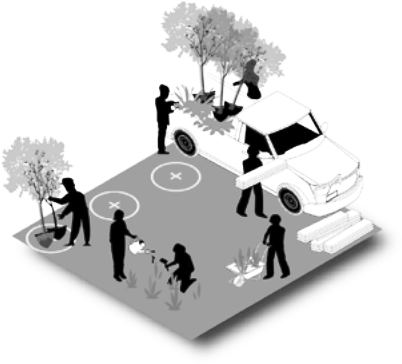
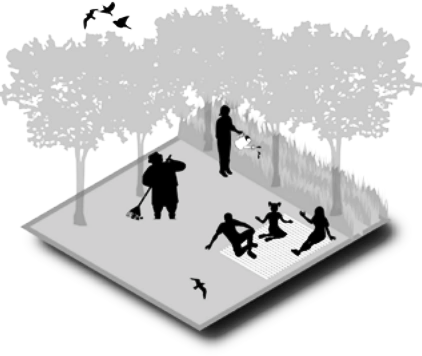
Building a park is a great way to connect neighbors, friends and others. The process requires dedicated volunteers who can give their time and energy, with a wide variety of skills — carpentry, landscaping, organizing, encouraging, leading. Like following a recipe, park building is a step-by-step sequence; most Park in a Truck parks go up in about 6–8 weekends.
The Create chapter is all about building your park. We broke the process down into eight phases. Each phase can be completed in roughly a weekend — the size of your park and number of volunteers will affect how long it actually takes. The phases are ordered for a reason; review each one and adjust your schedule as needed.
This book assumes you’ve done the cost estimate and know the quantities and materials you’ll need to order for each phase. If you haven’t, go back to the Dream step and use the cost estimator.
📄 Original workbook page (PDF page 3)
Volunteer release form
Make sure you have volunteer release forms available at the site whenever you’re working on the park. This form releases you from liability for injuries to your volunteers. It’s your responsibility to consult your organization’s legal advisors and insurance carrier before starting construction — they may want you to take additional steps to protect the organization from liability. Give your volunteers clear instructions about expectations and tasks for the work day; they’re more likely to come back in future weeks when they feel their time was put to good use.
⬇ Volunteer waiver and release form (PDF)One per volunteer; a parent or guardian must also sign for volunteers under 18
Phase 1: Organize
As in any process, the first and most important step is to organize your team by identifying project leaders and establishing a schedule. How many people you assign to these roles depends on the complexity and size of your project.
- Construction manager. Orders materials, is there for deliveries, gives instructions to volunteers on build days, and coordinates with the project manager on schedule.
- Project manager. In charge of getting volunteers, social media, ordering food, handing out waivers, coordinates finances and controls the schedule.
A project calendar is an excellent way to keep track of schedules, important dates, when volunteers will be working, and lead times for materials. Planning is as important as the building process itself — start off on the right foot.
⬇ Calendar template (XLSX)Sample project calendar and contact list — for reference, make your own copy
Phase 2: Prepare the lot
Steps
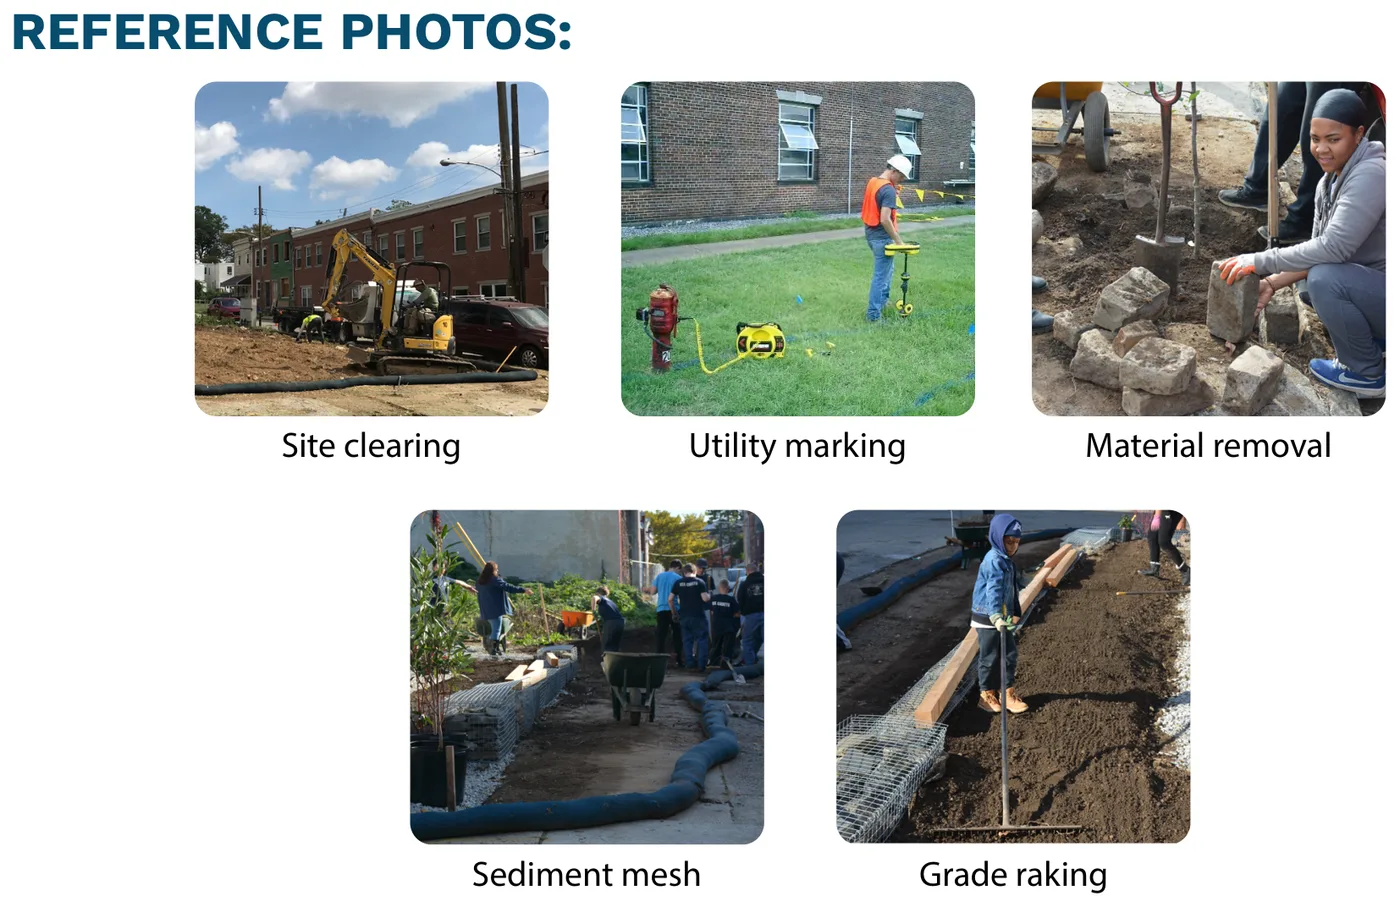
Step 1: Evaluate. Some sites need more clearing or grading than others, which can require special machinery — contact a landscape contractor if any of the following can’t be done by the community alone.
- Contact the PiaT team (ParkinaTruck@jefferson.edu) for a site visit consultation if you’re unsure how to prepare your site.
- Contact Pennsylvania One Call at 811 to mark utility locations.
Step 2: Protect. Bring small tools and equipment to the site. Set up protective construction fencing with wood posts at tree trunks, buildings and other items that need protection. Install silt/erosion control fencing around the site and at all drain inlets.
Step 3: Removal. Remove unwanted vegetation (including roots), tree stumps, trash and masonry materials — some vegetation removal may require herbicide treatment to control effectively in a timely manner. Prune existing trees to remove limbs from the trunk to at least 6’ high. Haul debris and vegetation off site to the proper dumping location; stockpile masonry materials on site to use as gabion basket fill.
Step 4: Site leveling. Begin grade raking and leveling the site. Make sure any Pennsylvania One Call markings are still intact and visible — soil grade should be relatively level with the sidewalk grade.
Equipment & tools
Useful links
- Tool rental — may be worth hiring a contractor for power tools, for efficiency and safety. West Philadelphia Tool Library ↗ (hand tools only; 1314 S 47th St) · OK Rental ↗ (link currently dead) (power tools, including chainsaws; 640 Main St, Darby) · Diamond Tool ↗ (could not verify automatically) (2800 Grays Ferry Ave)
- Waste & recycling — Fairmount Park Organic Recycling Center ↗ (3850 W Ford Rd)
- Tree pruning video — youtube.com/watch?v=pY5A-5gUqwo ↗
- Weed ID — Philadelphia Orchard Project weed guide ↗
- Herbicides (use sparingly, always follow label instructions) — Picloram for stump application on woody plants; Glyphosate for foliar application on herbaceous and woody plants; Clopyralid for mugwort and Canadian thistle. Invasive weeds that often need herbicide control: mugwort, Canadian thistle, Japanese knotweed and phragmites (herbaceous); Broussonetia, Ailanthus, Paulownia and Japanese honeysuckle (woody — cut and treat the stump only if too large to remove by the roots).
Preparation for next steps
Check your project calendar and revise as needed. Purchase and deliver any materials or equipment with lead times, and make sure the site is prepared for Phase 3.
Phase 3: Layout & gravel base
Steps
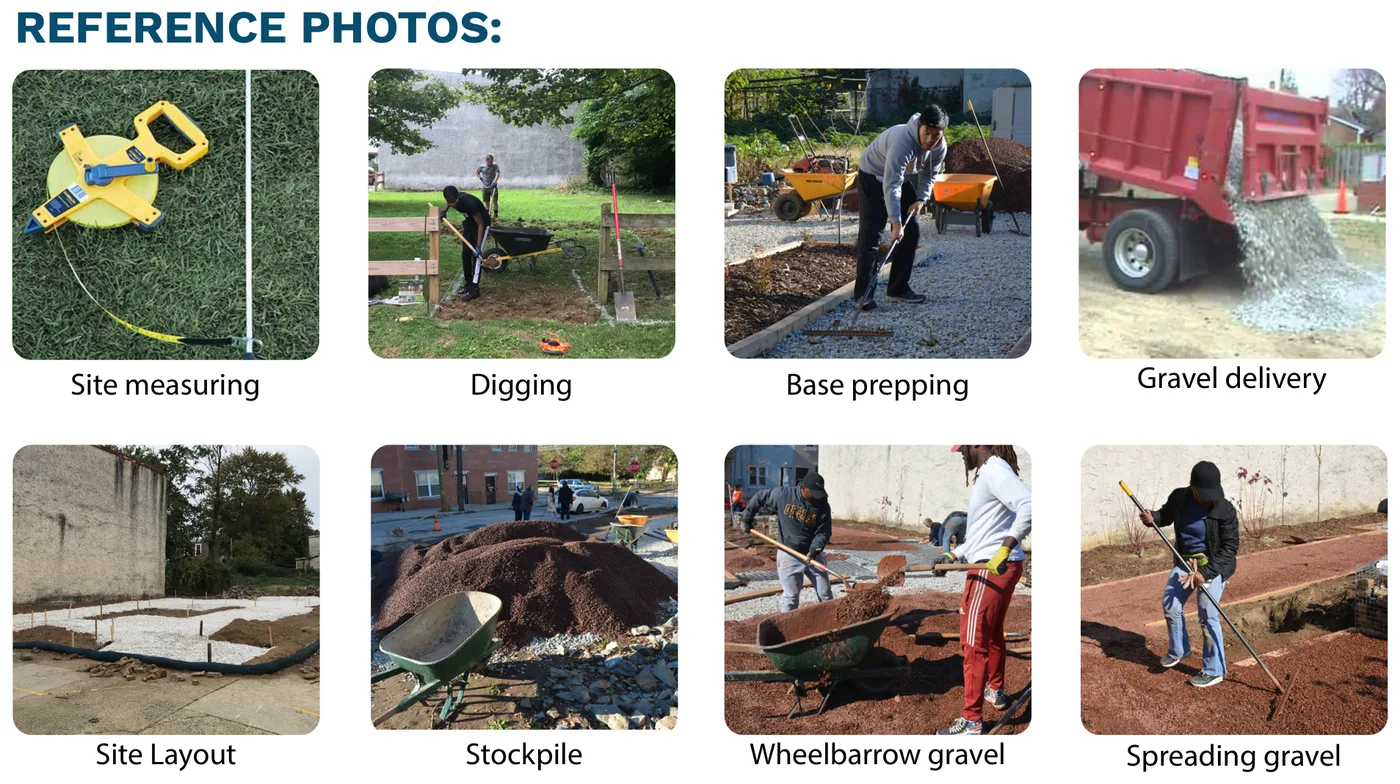
Step 1: Materials. Bring equipment and tools to the site; prepare for deliveries. Locate a stockpile area for gravel and cover it with a tarp if possible. Mark the general areas to receive gravel in spray paint — if there’s not enough room, coordinate the delivery with your city to have it placed in the street.
Step 2: Layout planting beds & park element locations. Begin at the starting point you marked in the Assess workbook. Refer to your plan for the locations and lengths of planting-bed and park-element edges. Use stakes and string line to mark the locations of edging and park elements you’ll add in later phases.
Step 3: Install sub base. Prepare ground surfaces for gabion baskets per the assembly instructions. Dig out entrances to allow for the change in level from the new park to the sidewalk — minimum 4” deep at the sidewalk edge, grading as needed (use excess soil to level pathways or add to planting areas). Spread gravel 2” deep in all areas except plant beds, about 6” wider than your string lines so the edging in the next phase can sit on top of the gravel. Run a vibrating plate over the gravel at least twice.
Step 4: Entrances & cleanup. Clean up overspill of gravel and clean up public areas.
Equipment, tools & materials
Materials: gravel, 3/4” roadbase.
Useful links
- How-to — Lay out planting beds ↗ (watch 1:50–2:40) · Install gravel sub-base ↗
- Tool rental — West Philadelphia Tool Library ↗ · OK Rental ↗ (link currently dead) · Diamond Tool ↗ (could not verify automatically)
Preparation for next steps
Check your project calendar and revise as needed. Purchase and deliver materials with lead times for the next phases. Make sure the site is prepared for Phase 4.
Phase 4: Install the edge
Steps
Step 1: Materials. Bring your edge materials (see the cost estimate and assembly instructions). Remove the erosion-protection fence; tree protection should stay unless its location interferes with edge installation.
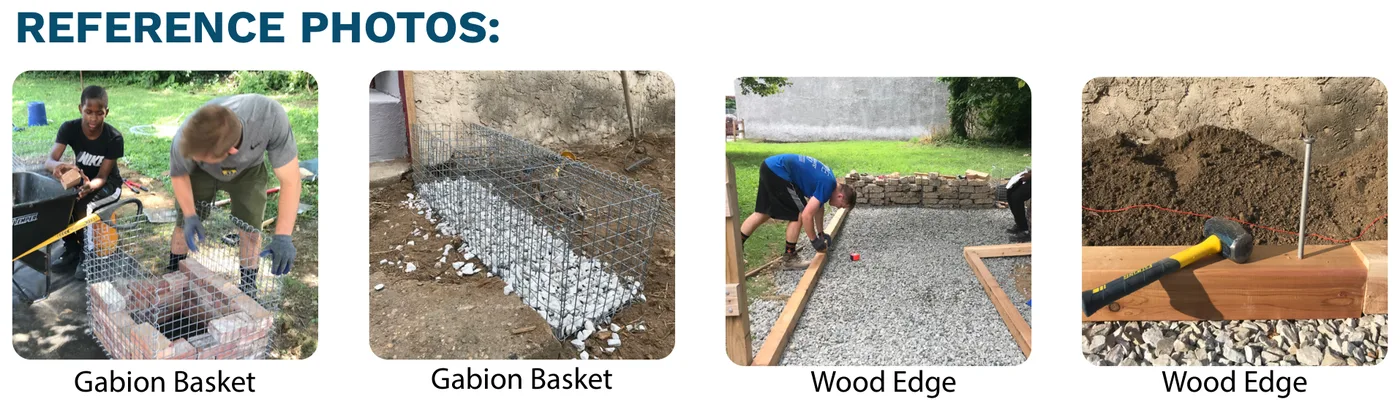
Step 2: Assemble. Assemble gabion baskets (refer to your Gabion Wall assembly instructions).
Step 3: Installation. Set up string lines so gabion baskets sit in a straight line along the park edge. Lay out the baskets according to your plan and fill the bottoms with 2–3” of gravel. Make small adjustments so the baskets are level and straight relative to each other — when used alone as tables or benches, use a leveling tool on top. Add wood edges where needed (see the Wood Edging assembly instructions).
Equipment & materials
Materials: gabion baskets; lumber and hardware for wood edge; large masonry material for gabion baskets, 3” or larger.
Useful links
- Materials — Castor Materials ↗ (crushed stone, delivery; 3301 S 61st St) · D&S Supply ↗ (crushed stone, mulch, tools; 4260 Macalester St) · Underdog Supply ↗ (bulk delivery; Conshohocken) · Galantino Supply Company (rental equipment and bulk materials; 725 Old Marple Rd, Springfield — (610) 544-2586)
- How-to — Build a gabion wall ↗
Preparation for next steps
Check your project calendar and revise as needed. Purchase and deliver materials with lead times. Make sure the site is prepared for Phase 5.
Phase 5: Spread topsoil
Steps
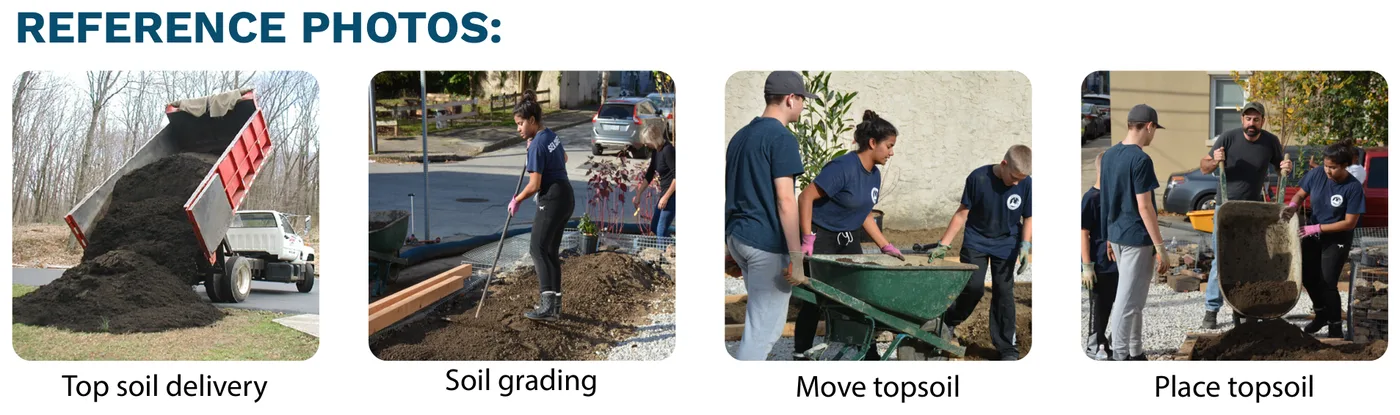
Step 1: Materials. Remove the tree protection fence. Locate a stockpile area for topsoil on the sidewalk or street — if so, apply for a temporary no-parking permit (see Phase 3).
Step 2: Soil installation. Prepare planting beds to receive topsoil by grading the existing soil. Spread topsoil approximately 4–6” deep and grade it for smoothness.
Step 3: Clean up. Clean up overspill of topsoil and clean up public areas.
Equipment & materials
Materials: topsoil.
Useful links
- Ordering — D&S Supply ↗ · Underdog Landscape Supply ↗
- How-to — Prep topsoil ↗ · Healthy topsoil for healthy plants ↗
Preparation for next steps
Check your project calendar and revise as needed. Purchase and deliver materials with lead times. Make sure the site is prepared for Phase 6.
Phase 6: Plant
Steps
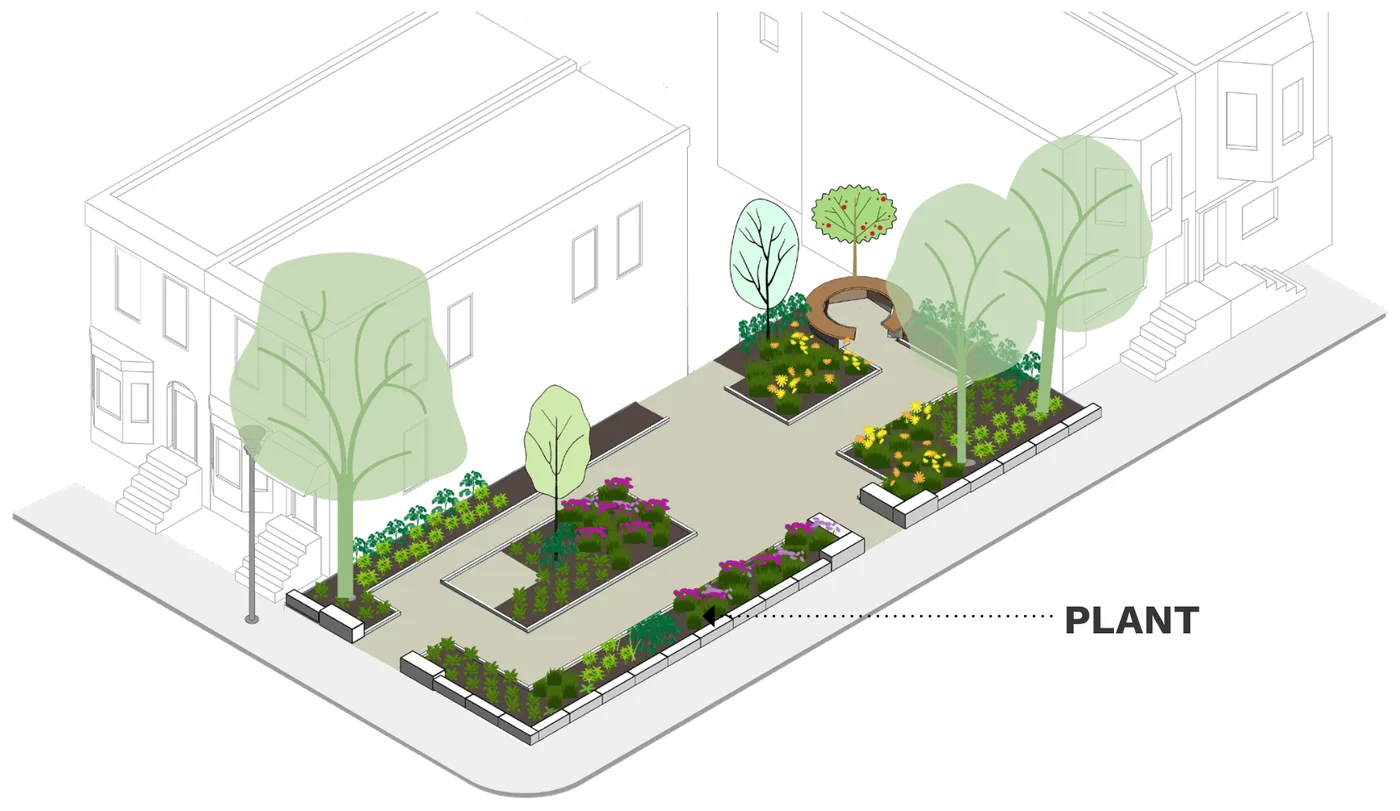
Step 1: Plants. Remove any weeds that have emerged. Make sure plant deliveries are scheduled and you’ve located a plant delivery staging area. Lay out trees and shrubs in their desired locations, then clean up overspill of soil and public areas.
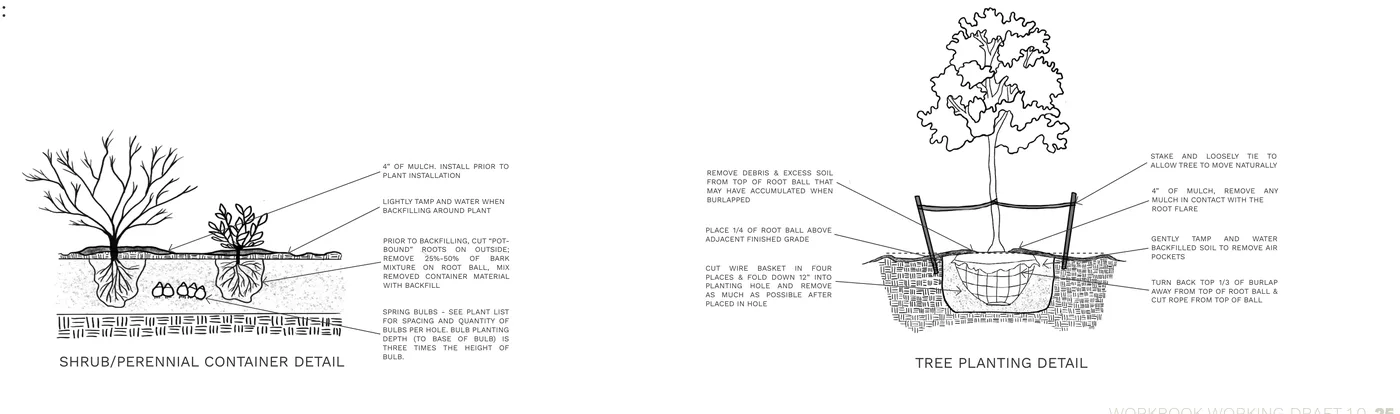
Step 2: Installation. Install large trees first (see the planting detail below). Install shrubs, fine-grade the soil, plant perennials, install 4” of mulch, then water all plants thoroughly — repeat twice a week until the plants go dormant for winter.
Equipment & materials
Materials: plants — be sure to reference your plant list.
Useful links
- General plant info — PHS Gold Medal Plants ↗ · Gardens Alive ↗ · North Creek Nurseries ↗ · Missouri Botanical Garden ↗ · Longwood Gardens plant explorer ↗ (link currently dead) · Arbor Day Foundation ↗ · Penn State Extension vegetable gardening ↗
- PiaT partner nursery — LandHealth Institute, 4862 Parkside Ave, Philadelphia · (267) 571-5750 · landhealthinstitute.org/nursery ↗
- Other regional nurseries — Good Host Plants ↗ (local pollinator specialist) · Pleasant Run Nursery ↗ · Pinelands Nursery ↗ · Archewild ↗
- Fruit trees — Philadelphia Orchard Project ↗ · Burpee ↗ · Stark Bros ↗
- Gardening workshops & lot help — Pennsylvania Horticultural Society ↗ · Grounded in Philly ↗ (legal help, insurance, lot data)
- How-to — Container & bulb planting tips ↗ · Containerized tree planting ↗ · How to plant a shrub ↗
Preparation for next steps
Check your project calendar and make sure you have a schedule for a Park Ambassador — see the Sustain step for details. Mulch suppliers: Mid Atlantic Pine Straw ↗ · Underdog Landscape Supply ↗ · Fairmount Park Organic Recycling Center ↗
Phase 7: Install the gravel surface
Steps
Step 1: Materials. Prepare for deliveries if not already stockpiled. Locate a stockpile area for gravel on the sidewalk or street (temporary no-parking permit, if needed — see Phase 3).
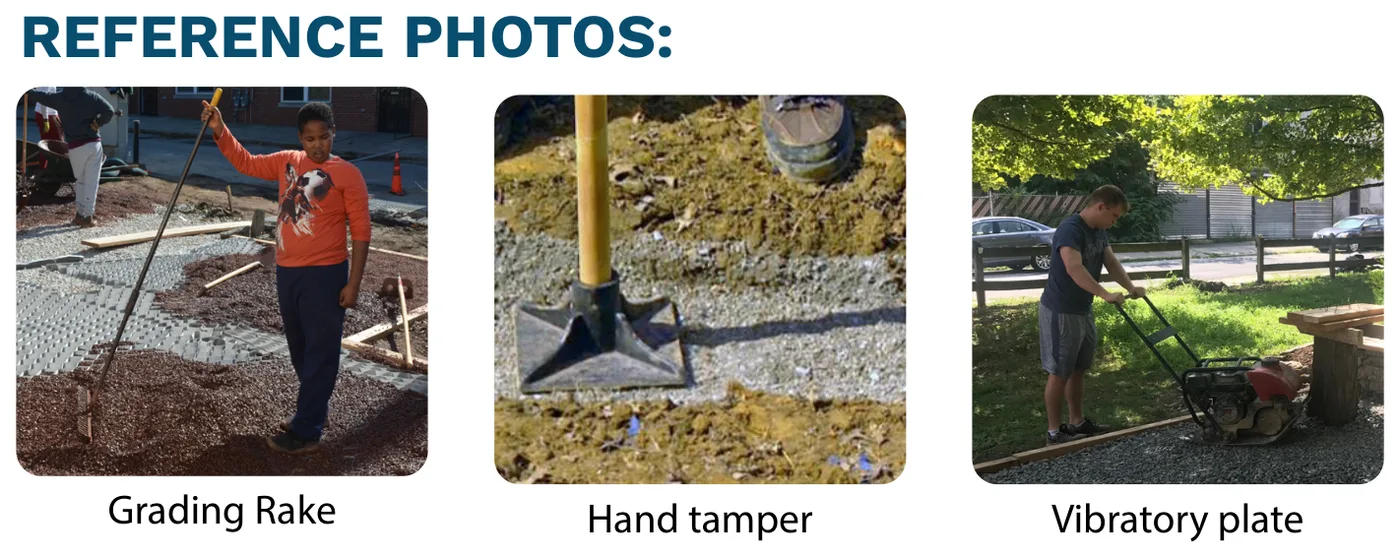
Step 2: Installation. Install the gravel surface using a wheelbarrow and landscape rake. Install gravel approximately 2” deep, spreading any excess evenly. Tamp down the aggregate with a vibratory plate to reduce settling, and move through all areas to make sure they’re level and even.
Step 3: Clean up. Clean up overspill of gravel and clean up public areas.
Equipment & materials
Materials: gravel, 3/8” or smaller (stone dust).
Useful links
- Materials — Castor Materials ↗ · D&S Supply ↗ · Galantino Supply Company ((610) 544-2586) · Underdog Landscape Supply ↗
- How-to — Install gravel ↗
Preparation for next steps
Check your project calendar and revise as needed. Purchase and deliver materials with lead times. Make sure the site is prepared for Phase 8.
Phase 8: Install park elements
Steps
Step 1: Measure. Review your assembly manuals and measure and mark out where your park elements need to go.
Step 2: Materials. Make sure you have all the materials outlined in your assembly manuals.
Step 3: Assemble. Assemble your park elements according to the assembly manuals.
Step 4: Install. Make sure you have proper room within your design to install the elements, then locate them in their final positions. You may be able to — or choose to — assemble elements ahead of time or off site.
Useful links
- How-to build a… (use the assembly guides first; these videos are backup) — Communal table ↗ · Cold frame ↗ · Raised garden beds ↗ · Compost bins ↗ · Potting bench ↗ · Outdoor garden shed ↗ · Gabion wall ↗
- Lumber & building materials — Woodland Building Supply, 4701 Woodland Ave, Philadelphia — (215) 727-5333 · C & R Building Supply, 1601 S 49th St, Philadelphia · A&A Lumber (cypress), Avondale, PA · Delaware County Lumber, Boothwyn, PA
Preparation for next steps
Check your project calendar and revise as needed — your park is almost done!